Wednesday, November 14, 2012

Mixed Media Tutorial - Bluebird Home

So a friend of  mine asked me to create a mixed media piece for her Mom for a Christmas gift.  She left the creative door WIDE OPEN for me and gave me a quote: 'the only thing better than having you for a Mom...is my children having you for a Grandma'

Can I just say WHA HOO!!  I love, love, love creating new designs and I especially love breaking open a new canvas and just let the creative juices flow through my finger tips.  Its an addiction - a passion...love. it. :)

So, I showed this piece in a previous post - when I was talking about my thumbprint on the creative world.

Now I want to show you how to CREATE this piece.  This is more of a tutorial on how you can dig deep and find your creative, artistic passion!


OK!!  So, lets start with a beautiful, crisp WHITE canvas :)  I LOVE to use 12x12 sized canvas with 1" deep sides.  But, you can use whatever size you want :)


Next (and this is one of my favorite steps!) pick your background color.  I generally like to pick three colors and just spread them on the canvas with a foam brush


Ok!  Let 'er dry!  You can either let it air dry (start a new canvas for another project or go take care of other projects you have going on) OR you can use a heat gun or hair dryer to speed up the process.  If you are like me (patience is NOT a strong point :) ) you will use the heat gun to speed it up...


Next step is to pick out some stencils.  I. LOVE. STENCILS.  I have a rather large pile of them sitting on my table in my studio :)  For this project I have chosen four to layer on the canvas.


In regards to color - try to use colors that pop against your background color.  (You will understand why later on in this tutoral :) )  You want to create interest in your piece and this is a great way to do so.  Let your heart flow into this - choose colors that would almost scare you to put together - you will be surprised and how well it all turns out.
VERY IMPORANT STEP:  You need to let each layer dry prior to applying the next layer.  Otherwise you will have a big gloppy (but colorful!) mess :)

First layer of stencil:  Turquoise (then let it dry or dry it yourself)


Next layer:  Hunter green (let it dry or dry it)


Next layer:  deep, dark red (again, needs to dry...see my cute pink heat gun in the corner here? LOL)


Next layer:  Light pink (looks white, but its really light pink.. - let 'er dry!)


Finally, after all of that hard work of layering, you are going to put a nice 'wash' over the stencils.  The reason for this is to 'tone' down, or age, your background so the foreground will really pop and the two are 'fighting' with each other. 

Have a paper towel or rag handy for this step, can be kind of tricky: 
  Take your brush, fill it with your background color and then dip it in water (you are creating a wash here - Yay!). 
Now, brush it on the canvas.  After you have brushed it on, start wiping and dabbing your towel on the wash.  Don't completely wipe it off - you want to tone down your background but you don't want to completely wipe your wash away :)


Voila!  Your background is now 'aged' and toned down :)


Your next layer is STAMPING!  LOVE stamping!!  Pick whatever stamps you want for your background.  I like to use Ranger archival black ink - it really brings out the stamping but not too much so that it dominates everything :)


Go ahead and stamp away on your canvas - create texture and interest as you go~

Ready for another layer?  That's what mixed media is all about - layering and more layering.  Love it!


So..have to admit...I am a rub-on junkie...I have a slew of them in my studio.  My most favorite are white rub-ons.  They just really, really highlight your piece and gives it another dimension.


I like to add the white rub-ons around the perimeter of my paintings - to give it more of a 'frame'.


I am SO, SO excited about this next product - Faber-Castell has a super AWESOME WHITE paint pen.  I have been looking and looking for something like this for quite a while.  This pen is amazing!  It is so opaque and the paint goes on smooth.  Love them - if you can find them, get two or three as they sell out quickly.  You will fall in love too!


With the white pen I like to draw my 'bumps' around the perimeter of the canvas


Yet another staple in my collection are the Faber-Castell artist pens big brush.  Again, AMAZING products.  I love how they stay wet JUST long enough for me to 'smear' my finger through to add shading.


Paint...


 Smear!  (Repeat!  Get your hands dirty!)


Background - done!  Lets move on to the foreground!


I love using scraps of paper to build the subject of my work...this just happens to be a bird house and branch


Paint the pieces whatever color you are feeling...


(Um, yeah, that is my table underneath the paper...LOL - fun, huh?)
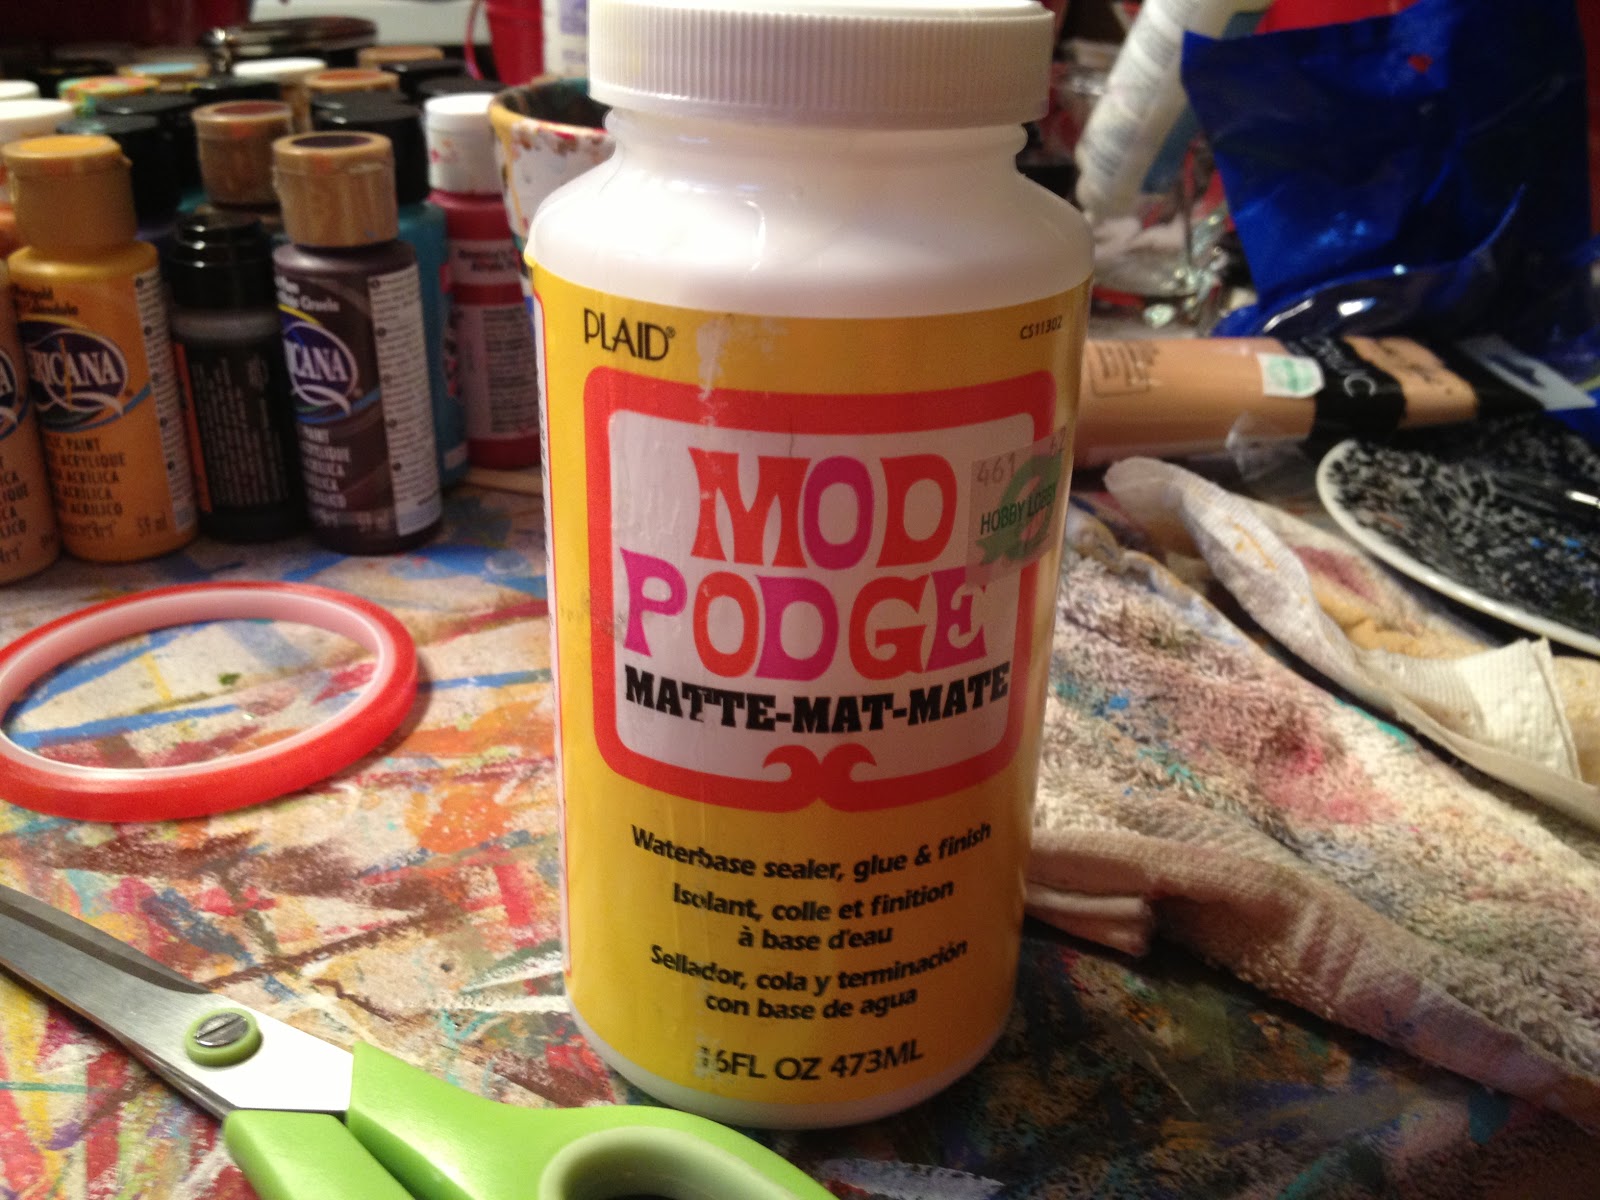

Seriously, who doesn't love Mod Podge?  I should own stock... :)


Mod Podge your pieces onto the canvas.  Please note:  I only Podge the BACK of my pieces and not the front - this will allow you to modify the house easily with paints and pens.


Sunflower petals ready for antiquing :)  I cut the petals out of scrap paper and applied the stain directly on the petals and then wiped the excess away


:)  Podge the sunflower on!  Doesn't have to be perfect :)


Musical note paper...those are the leaves for the branch...


Lightly paint the leaves in a deep green.


Ok, we need to add some dimension to the leaves - remember the super fantastic Faber-Castell paint pens? 


Shade in the outline and inner 'vein' of the leaves with that pen - remember:  Paint, SMEAR - repeat :)


Yet another great product that is so easy to work with - Faber-Castell gel sticks.  Again, super easy to use -

Apply...


Smear- repeat! (the gel sticks come in many colors so use as many as you want to make your leaves come alive!)

I wanted my leaves to have a 'stitch' look to them so I grabbed my Faber-Castell white paint pen and painted in my stiches.

Black ink pen to outline the house...

More details!  I may add more details than the average bear but its what I love and it really makes my work come alive.  Hopefully you will find this too!


And outline the sunflower plus add shading to the petals...
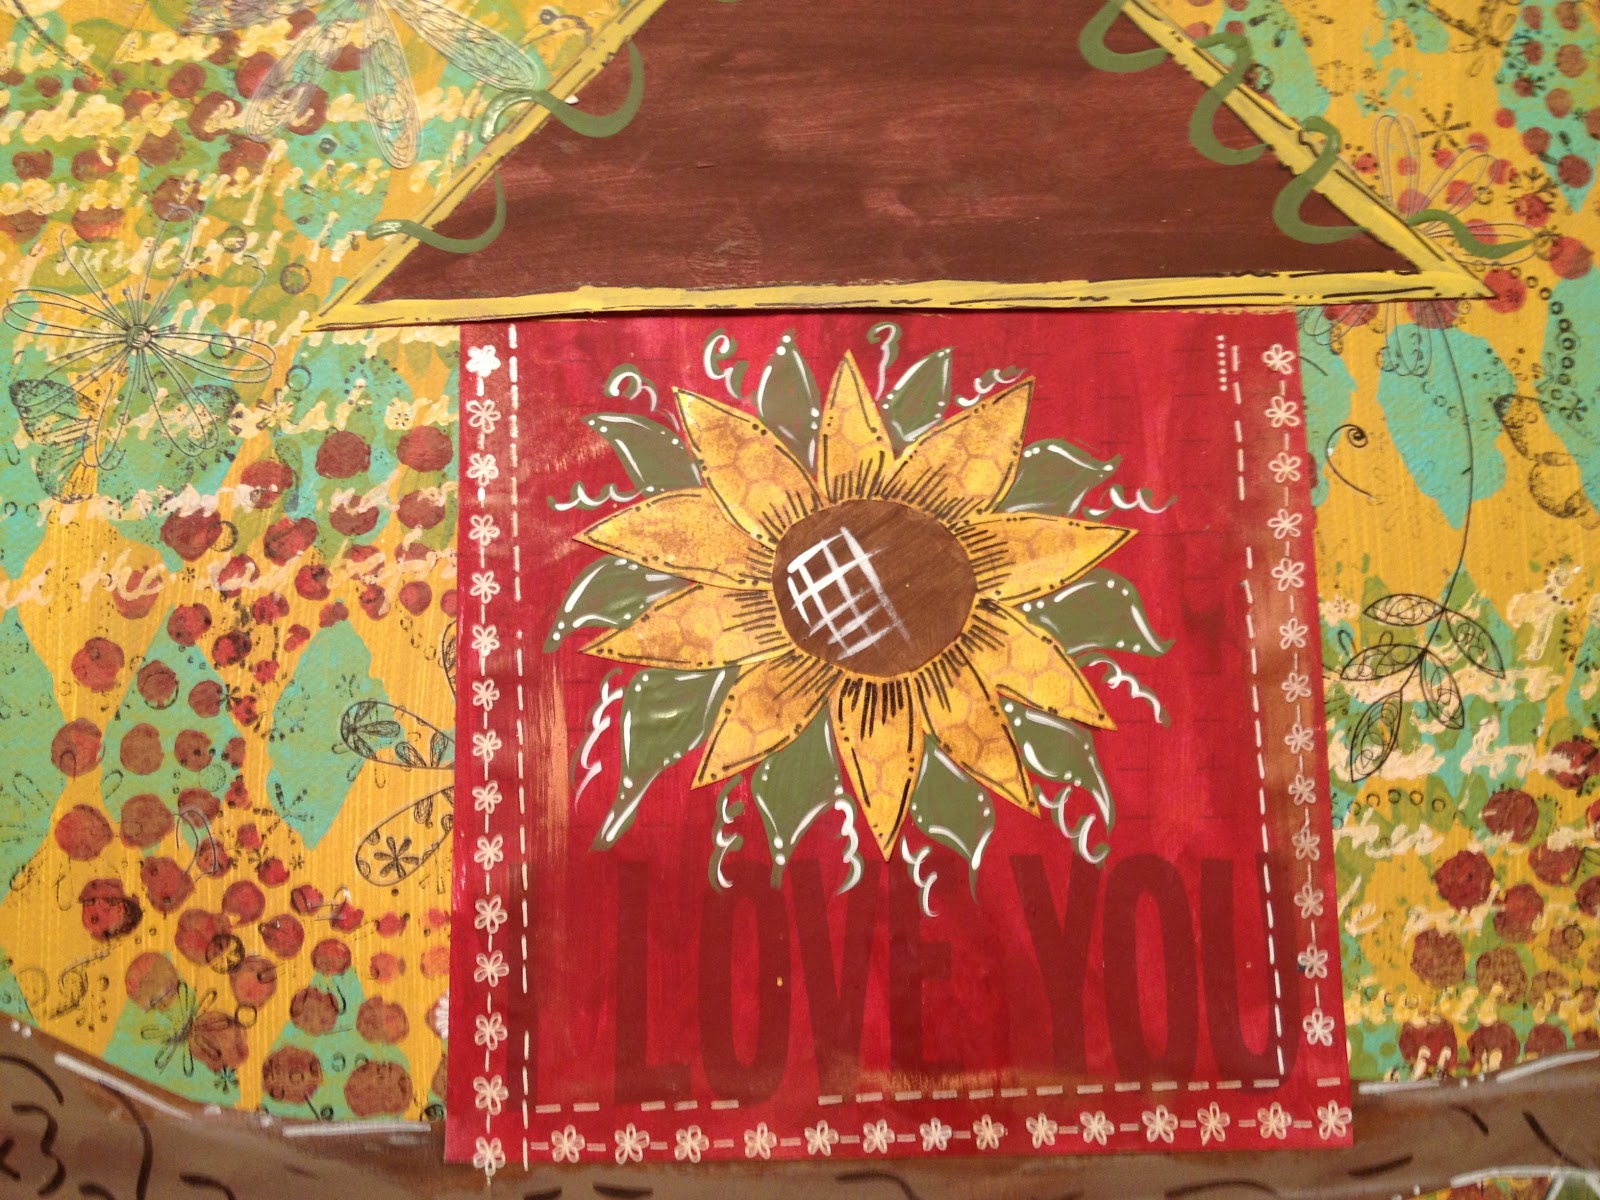

Here is the finished sunflower after adding in more detailing, painted in some leaves and vines plus I added some rub-on framing to the house.

Now, add your vine with sunflowers and roses to the roof of the house!  Be adventurous with this - if you don't like the flowers here, add your own twist and spin :)


Bluebird time!  Can you tell I just adore Faber-Castell products :)
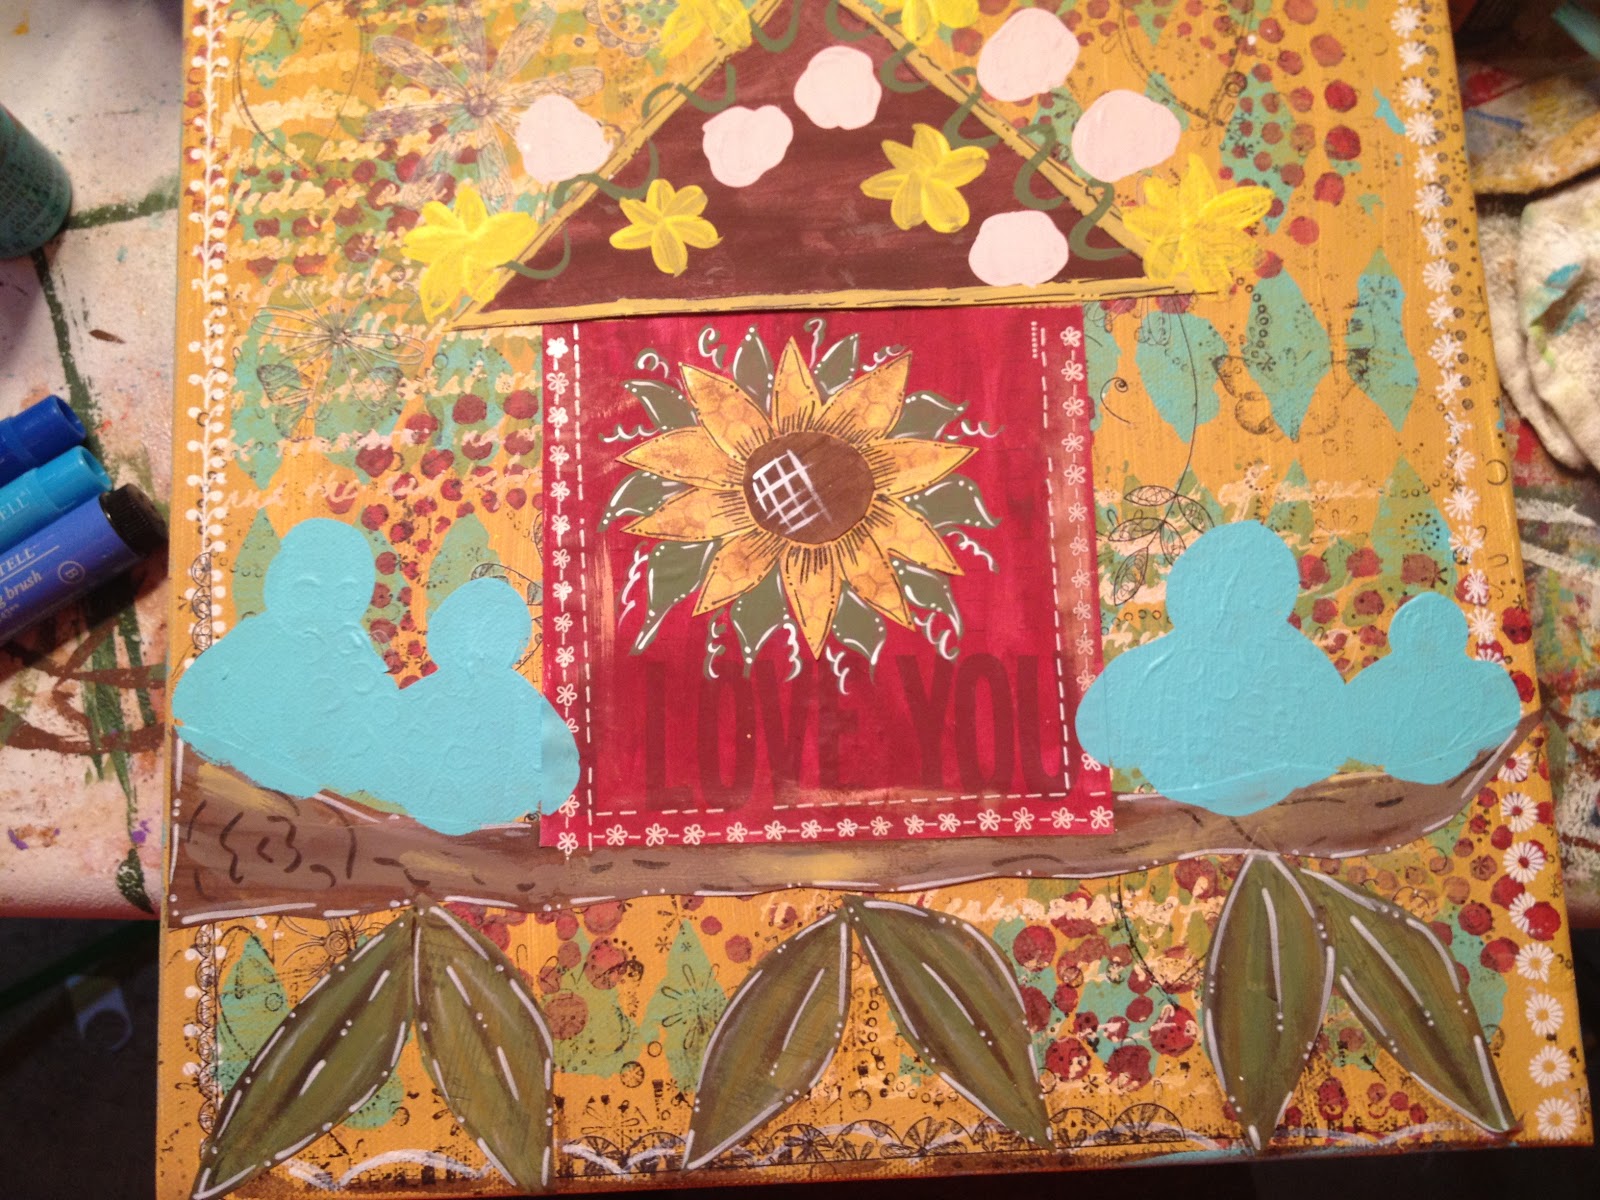

I start each bird with turquoise paint.  Paint a large circle on the bottom for the body and a smaller circle on top for the head.  Add a couple of 'bumps' on each side of the body and there you have it!  Easy peasy!! 


Add eyes and beak with your black ink pen...


Shading time :)  Outline the birds with your blue Faber-Castell pen, let dry.  Then take your gel stick and shade in each bird - remember, you only need a little bit of the gel and then rub it around until you get the look you want.


Outline in black ink and white paint pen.  Add your own personal touches to the birds too! (yellow beak, tufts of hair on top :) )


Adding detail to the flowers - shading, painting, black pen, white pen - are you seeing a trend in my detailing here? :)


The smallest details make the biggest difference don't they?


Voila!!!  ALMOST finished product LOL!


Your final step is using GESSO to add the white to each sides of the house (look for this in the paint/canvas section of your favorite hobby store).  Apply ONE coat of gesso to each side of the house. Once the gesso is dry you will notice it is almost like flat house paint :)  Meaning, its very easy to write on.  Take your black ink pen and write your quote on the gesso.  Let dry.


Congratulations :)  You are done :)

I highly encourage you to develop your own 'style' of this piece.  While its okay to try and make an exact replica, you need to find your own 'thumbprint' - what makes your style unique?  What makes it you?  When YOU look at it do you think, 'Yeah, that's totally me!'

Give it shot - We ALL have an inner artist - we just have to dig deep to find it and get EXCITED about creating!


Tuesday, November 6, 2012

Evolution...of a DoOdLe :)


Today I was thinking how I could possibly enhance my blog to make it more meaningful - how someone could get more out of it.  While I love sharing my thoughts, my inspirations - I also wanted to show others how they too can be an artist.  

So then I thought...why not show my pieces in their evolution stages.  From start to finish...

First off are my doodles - I. LOVE. to. DoOdLe.  You can literally turn what you think of as scribbles and, well, doodles into BEAUTIFUL works of art.

The first thing I always do when I doodle is I just start drawing.  I draw shapes - circles, squares, triangles...I draw flowers...LOTS of flowers.  I draw leaves, paisleys, anything really that comes to mind.  I grab my journal and I doodle. (This is also great for practicing at night in front of the TV - you are spending quality time with your sig other and yet still getting your drawing practice in!)

This is different from the finished project below but I wanted to show you what one of my doodles looks like in total black and white :)

So then, I grab my watercolors and my watercolor 'pen' and I start painting.  I LOVE watercolors. My favorite right now are Koi watercolors and they come in this fabulous travel tray that you can take with  you anywhere.  Watercolors so forgiving and if you don't like how some paint comes out, go over it, blend it, smudge it.  Love me some watercolors! :)


I often get asked - how do you come with your designs or how do you know what colors to use in your doodles.  The answer is - I don't know immediately what I am going to create.  I just start and evolve the piece as I go.


  I NEVER sketch my doodles in pencil - always in black sharpie with a fine tip (gasp!).  But what if I make a 'mistake'?  In my mind - there are NO mistakes.  Art is what comes from your heart.  If you feel you make a mistake - keep going.  Shade around it...make a shape out of it.


And as far as colors go...let me tell you.  I love, love, love color.  The more the better I always say.  So keep adding color in.  OR, even better, pick THREE colors - and only THREE - and use those in your piece.  OR take one color and use different shades of that one color.  There is just SO much you can do.  Limitless, endless.

When I am done painting (and this is my favorite part) - I add the small details.  The smallest of details can really make your piece pop.  Shading with the pen, adding definition to the petals:


Once you feel your piece is done, sit back and enjoy your work.  I love giving my pieces away in a nice, simple black frame so the colors REALLY pop.

In my next post, I will show how one can add mixed media elements into their doodles and how you can really make each piece fun and unique~

Thursday, November 1, 2012

Creating my style..my thumbprint

Every artist has their own 'style' so to speak.  It is their thumbprint - no one else has one quite like theirs.

The more I create - the more I see my own style and thumbprint.  How no one else has is quite like mine.


I often compare my work to others...as many artists do, but, I am slowly growing into an artist who DOES not compare her work to others.  Its MY thumbprint...its my uniqueness.  It makes me...happy :)  Why would I want to do work that is like others...that's not unique...that's not me.


Sometimes its cutesy...sometimes its inspirational...sometimes its inspiring...and sometimes its awful! (LOL)
But, if I don't like something or I get frustrated...I get back up and try again.  Its what passion is truly about - if you get knocked down, you get right back up and keep going.


That is exactly what I thought when I looked at this piece after it was 'finished' (my works are never finished...I always have something else I want to do to them)  It was cutesy...did I want that?  Did the client want that?  No matter...its what spoke to me at the time when I started putting paint (and paper, and ink and mod podge and gesso, etc etc) to canvas.  My thumbprint started revealing itself as I progressed further through the piece.


So, this is my thumbprint...I think I kinda like it...no...I kinda LOVE it :)


Monday, October 22, 2012

Color, stacking, color, stacking....

I love color - lots and lots of color :)  This is why I admire artists such as Flora Bowley, Christy Tomlinson and Donna Downey.  They always use tons of color in their work and it just flows and works together.  They have inspired me to just let me paint and not have to...well, THINK about it - just let the work flow out of my hands.


So now I am really into creating pieces that I can have all sorts of different variations lined up or STACKED on my canvas...The above are my bird houses...love, love, love creating this piece.  So much freakin' fun.

Below are my doors...just cut up some paper and started painting and adding texture and embellishments, etc.  So much fun - and I just love the way they turned out.  Look at all of the colors and textures...you never see the same thing twice.


I have both pieces now hanging up in my kitchen/dining room area - they just make me so happy and so...calm when I look at them.  Also makes me want to get back into the studio and create another piece...can't wait!

Have a great rest of the week!!

Sunday, October 14, 2012

She soared...

Wow...what a week.

Lots of ups and downs this week at work, at home and even at school for Brady.  I had found my inner peace a couple of months ago - it was so amazing.  Just one day I felt at peace and had clarity.  I knew what I wanted out of life and how I was going to get there.  I knew what I wanted for my family, for my boys.  And I felt...at peace.  So nice...so comforting.

And then BAM! My inner peace has been challenged by these bumps in the road in this thing called life :)  The stresses of work + keeping a home, well, a HOME + having a special needs child that needs our attention not only at home but at school too + having another child that we need to spread our love to as well+ having time for each other + having time to spend by ourselves to regain our own sanity...it can get downright overwhelming!  But...that's when I look at what we DO have vs. what we don't have... we have a beautiful home (that seems to be getting smaller but we make due...have to, right??), we are making new friends in this small community, we laugh...we laugh a lot....that is so important. ( I firmly believe humor in a relationship is vital - it gets you through the toughest of situations.)  I have my Mom who supports me and has the same passion as I do when it comes to art - I love that and I immediately calm myself when she is around.   And our kids...what would we do without kids...they make us laugh and cry...and every single day help me realize how sweet life truly is.

I was inspired to make this piece over the weekend - I had sketched her out last week and was going to make her for a friend's little girl...but things changed...I started wanted her all to myself :)  Oh well - that's why I buy canvases by the bulk LOL

I wanted to make something that reminded me to stay inspired...to stay brave...to listen to my heart and keep that inner peace INTACT. :)


 When it was finished I (as I always do) picked it apart...too pinky, her bust is too big (LOL) too much this, not enough that...
But then I started adding the words that I had in my mind to include on this piece...


 ...and you know what...I loved it.  I loved everything about it.  And it also rejuvenated my inner peace and my dreams...for myself and for my family.


Friday, September 28, 2012

Behind the scenes art video!!

Ok, I know it has been a looooooong while since I posted in here (super busy with school for the kids, full time job, life in general and my super awesome little part time art business :) )

So, I am going to be posting behind the scenes videos for everyone to see how my art is created.  This is so cool - this is what I have been wanting to do for a LONG time - teach others how to create and how to just LOVE art and LOVE being messy and creative.

So without further ado - here is my finished piece:

 I just love Halloween - all of the colors that are associated with it along with the celebrations - love it.
This is a quote from a Disney Halloween Movie - I always like to have some kind of phrase or wording in my work - just gives it more meaning.

And here is my behind the scenes video of how this piece was created.  The music I chose to include in the video is the same music I like to listen to as I am creating a piece.  Future videos will have me talking but this one is all visual :)  Enjoy!!